You know, some desserts just take you back to a cozy afternoon with friends, and one of those for me is this gluten free tiramisu brownies recipe. I first made it for a casual weekend gathering, and honestly, the rich fudgy chocolate base with that dreamy, creamy tiramisu topping had everyone asking for seconds (and then some). There’s something so comforting about the way the espresso powder in the brownie base sneaks up on you, followed by the smooth mascarpone cream just melting on your tongue. It’s a dessert that feels fancy but is totally homey, and I love making it when I want to impress without too much fuss.
Why This Recipe Shines
- Flavor Harmony: A perfect balance of intense chocolate and delicate coffee undertones.
- Easy Assembly: No complicated techniques—just straightforward layers you can master.
- Texture Play: Fudgy base meets silky mascarpone cream for a dreamy mouthfeel.
- Showstopper Finish: Dusting of cocoa powder adds elegance and a hint of bitterness.
This gluten free tiramisu brownies recipe is a real standout because it marries two beloved desserts into one indulgent treat. You get the dark, rich aroma of espresso and cocoa swirling together in the brownie base, while the airy mascarpone cream adds that luscious, light finish. The contrast in textures—from dense to fluffy—is what makes every bite memorable. Plus, it’s naturally gluten free without sacrificing any of that classic tiramisu charm.
And don’t worry if you’re new to layered desserts or gluten-free baking! I’ll walk you through each step, so you’ll feel confident and get excellent results. Whether it’s for a last-minute gathering or just a cozy treat at home, this recipe comes together smoothly with tips I’ve learned along the way, so you can enjoy every moment—no fuss, all flavor.
Ingredients You’ll Be Working With
Before we dive in, it’s helpful to note that measuring your ingredients accurately is key to this recipe turning out perfect. Exact amounts are listed in the printable recipe card at the end to keep handy while you bake.
- Gluten free all-purpose flour: The sturdy, crumbly base of our brownies, make sure it’s spooned and leveled for best texture.
- Cocoa powder: Provides that deep chocolate richness; unsweetened to control sweetness.
- Espresso powder: Intensifies chocolate flavor and adds subtle coffee notes—espresso or instant works.
- Sugar: Sweetens and moistens the brownie batter evenly.
- Eggs: Helps bind everything together; room temperature eggs mix better.
- Melted butter: Adds richness and keeps brownies fudgy; don’t substitute oil for same flavor.
- Vanilla extract: Rounds out the flavors with warm, sweet aroma.
- Mascarpone cheese: The star of the tiramisu topping, providing creamy texture and a touch of tang.
- Heavy whipping cream: Whipped to fluffy peaks, it lightens the mascarpone layer beautifully.
- Powdered sugar: Sweetens the cream without gritty texture.
- Brewed espresso or strong coffee: Adds classic tiramisu flavor; cooled before folding in.
- Unsweetened cocoa powder (for dusting): Gives that final, elegant touch.
If you’re short on mascarpone, cream cheese can work as a substitute, though mascarpone is preferred for that authentic tiramisu creaminess. Also, any gluten free blend you trust will do well, just avoid mixes with large chunks, which could affect the brownie texture.
Chef’s Note
You’ll find the complete list of ingredients with exact measurements in the printable recipe card at the bottom of this post.
Tools You’ll Need
- 8×8 inch baking pan: Perfect size for the brownies; lining with parchment makes removal effortless.
- Mixing bowls: One for wet ingredients, one for dry, and another for the cream topping.
- Electric mixer or whisk: Useful for whipping heavy cream to stiff peaks and smoothing mascarpone.
- Sifter or fine mesh strainer: To dust cocoa powder evenly, avoiding clumps.
- Spatula: For gentle folding and smoothing layers without deflating the whipped cream.
- Measuring cups and spoons: Accurate measurements are key for gluten free baking success.
How to Make Gluten Free Tiramisu Brownies Recipe
Ready to assemble this crowd-pleasing dessert? Let’s start by prepping your pans and gathering the ingredients so everything flows seamlessly.
- Preheat and prepare: Set your oven to 350°F (175°C) and line an 8×8 inch pan with parchment paper, ensuring an overhang for easy brownie lifting later.
- Mix wet ingredients: In a bowl, whisk together melted butter, sugar, eggs, and vanilla extract until smooth and glossy. This emphasizes moist, tender brownies.
- Combine dry ingredients: In another bowl, sift or whisk gluten free flour, cocoa powder, and espresso powder until evenly mixed so you avoid lumps.
- Form the batter: Gradually fold the dry ingredients into the wet, stirring just until combined into a thick batter. Avoid overmixing to keep brownies fudgy.
- Bake the brownies: Pour batter into your prepared pan and smooth the surface with a spatula. Bake 20–25 minutes; check doneness with a toothpick—it should come out with moist crumbs but no raw batter.
- Cool fully: Remove brownies from the oven and let them cool completely in the pan on a rack. This ensures the tiramisu layer won’t melt or slide off.
- Prepare the tiramisu cream: Beat mascarpone cheese with powdered sugar and a splash of vanilla until creamy and smooth.
- Whip the cream: In a separate bowl, whip heavy cream to stiff peaks—this means when you lift the whisk, peaks stand firm without drooping.
- Fold cream and coffee: Gently fold the whipped cream into the mascarpone mixture to keep it light and airy. Then, add cooled espresso or brewed coffee and fold just until combined.
- Assemble and chill: Spread the tiramisu cream evenly over cooled brownies. Cover and chill for at least 2 hours—this rest time lets the layers meld brilliantly.
- Finish and serve: Just before serving, dust generously with unsweetened cocoa powder for that authentic look and slight bitterness to balance the sweetness.
Kitchen Wisdom
- Tip 1: Use room temperature eggs and mascarpone for smoother mixing and no lumps.
- Tip 2: Don’t overbake the brownies—you want them fudgy, so check early.
- Tip 3: When folding whipped cream, use gentle motions to keep it airy.
- Tip 4: Make sure your espresso is cooled before adding to avoid melting the cream layer.
How to Serve
Flavor Boosters
Dust a bit more cocoa or even some finely grated dark chocolate for an extra chocolatey kick. If you like a touch of sweetness, a drizzle of coffee-infused caramel sauce pairs beautifully with these gluten free tiramisu brownies recipe layers. For a festive twist, sprinkle with chopped toasted hazelnuts or a hint of cinnamon.
Perfect Pairings
A bold espresso or cappuccino is a natural partner, echoing the coffee notes in the dessert. For a boozy accent, try a glass of coffee liqueur or a smooth amaretto. If it’s a kid-friendly treat, milk or a mild hot chocolate works perfectly to complement the rich flavors.
Presentation Touches
Cut into neat squares using a hot, sharp knife to get clean edges. Serve chilled on pretty plates with a dusting of cocoa right before plating. For gatherings, individual portions in small ramekins or clear cups with layers visible add a lovely touch. These brownies also make great gifts when wrapped in parchment and tied with a ribbon.
Variations & Easy Swaps
- Dairy-free: Substitute mascarpone with coconut cream mixed with dairy-free cream cheese; use coconut-based whipping cream.
- Fruit twist: Add a layer of fresh raspberries or strawberry slices under the mascarpone for brightness.
- Nutty upgrade: Fold toasted almonds or walnuts into the brownie batter for a bit of crunch.
- Chocolate modification: Swirl in chopped dark chocolate chunks into the brownie before baking for melty pockets.
- Spice it up: Add a pinch of cinnamon or cayenne to the cocoa mixture for warmth and subtle heat.
Make-Ahead, Storage & Reheating
- Make the brownie base a day ahead and chill; add the tiramisu cream layer just before serving.
- Store assembled brownies tightly covered in the fridge for up to 4 days—perfect for weeknight treats.
- If needing to soften chilled brownies, let sit at room temperature for 15–20 minutes before serving.
- Do not freeze the tiramisu topping layer as it can alter texture; the brownie base itself freezes well unassembled.
FAQs
- Can I make this recipe vegan? It’s a bit tricky because mascarpone and eggs are essential, but you can attempt with vegan substitutes like cashew cream and flax eggs, though texture and flavor will differ.
- What if I don’t have espresso powder? Instant coffee granules or a strong brewed coffee concentrate can work as a substitute in the brownie batter.
- How do I prevent the tiramisu topping from being runny? Be sure to whip the heavy cream to stiff peaks and fold gently into the mascarpone, and chill the brownies completely before layering.
- Can I use regular all-purpose flour instead? Absolutely, if gluten isn’t a concern, but this recipe shines especially as a gluten free tiramisu brownies recipe.
- Is it okay to skip chilling the dessert? Chilling is crucial for the tiramisu layer to set well and prevent it from sliding off, so plan for at least 2 hours in the fridge.
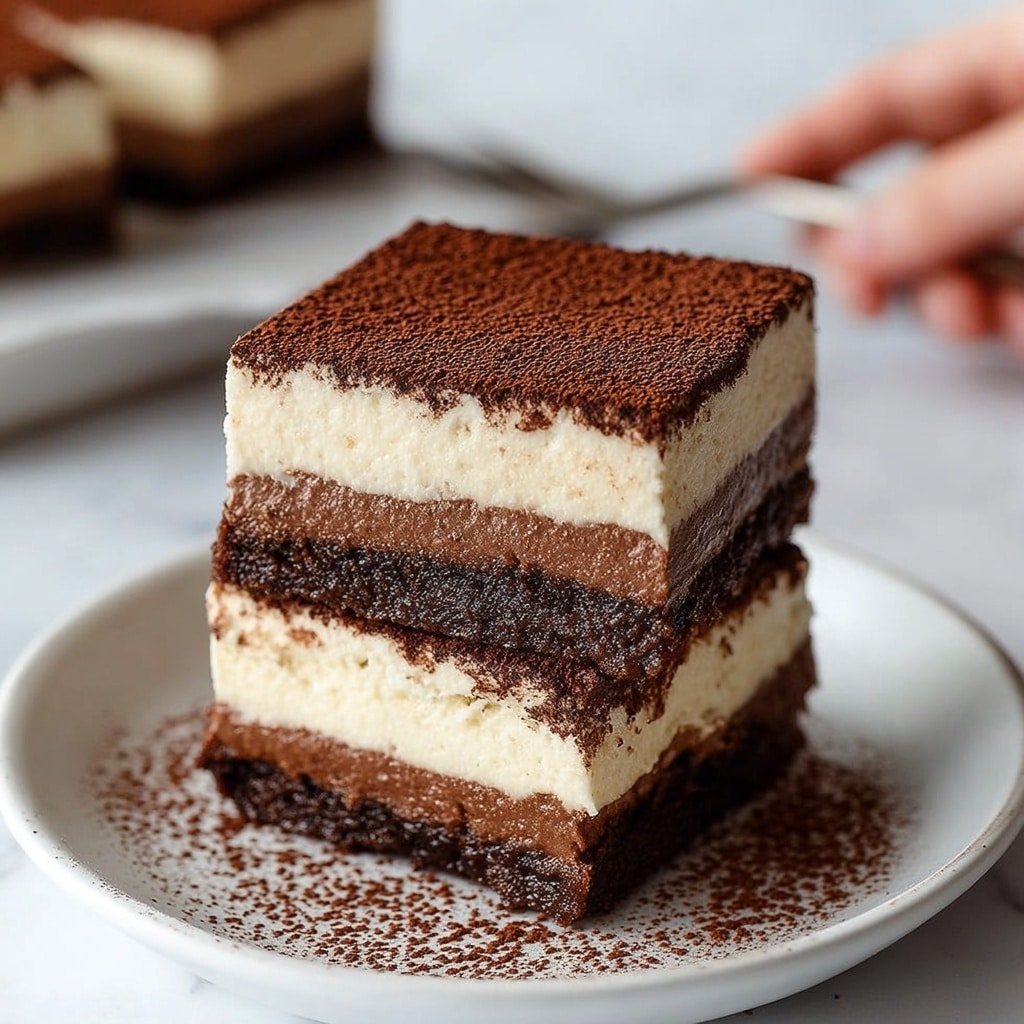
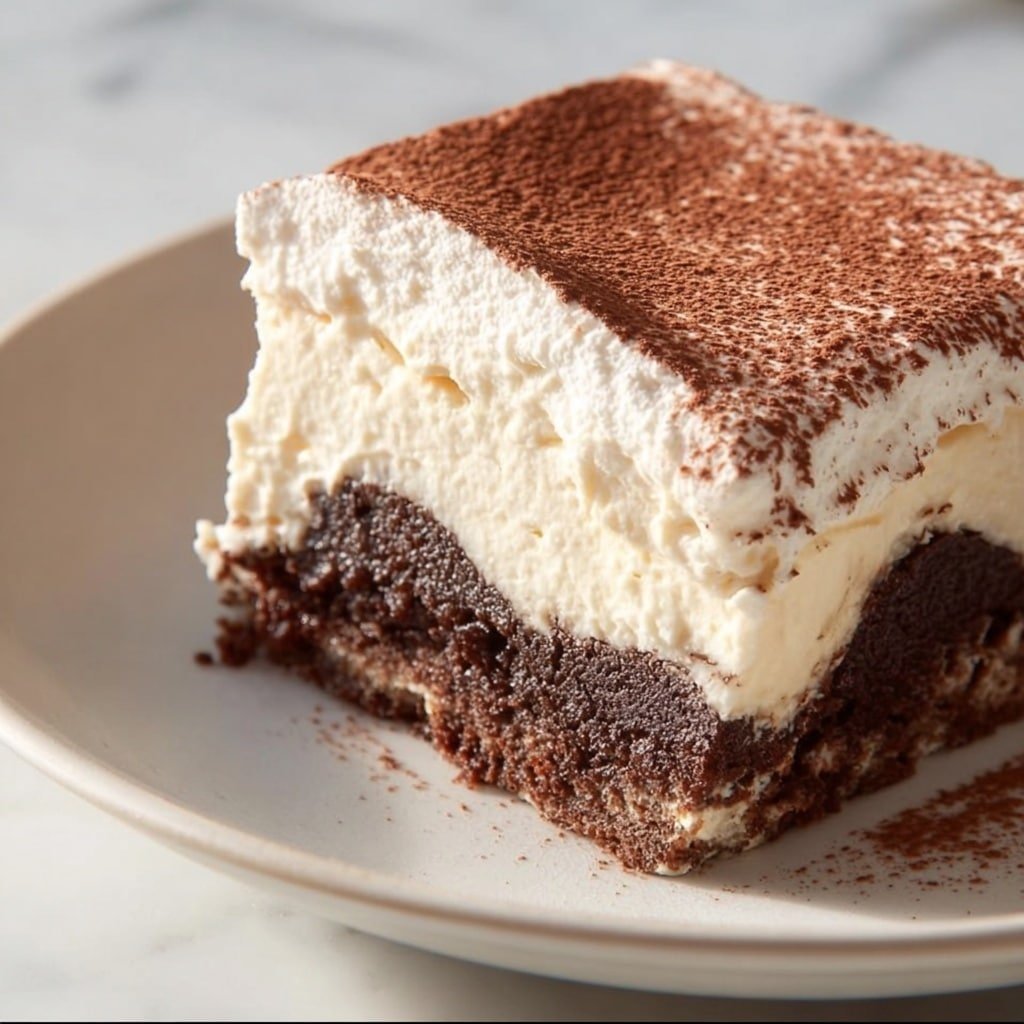
Gluten Free Tiramisu Brownies Recipe
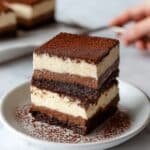
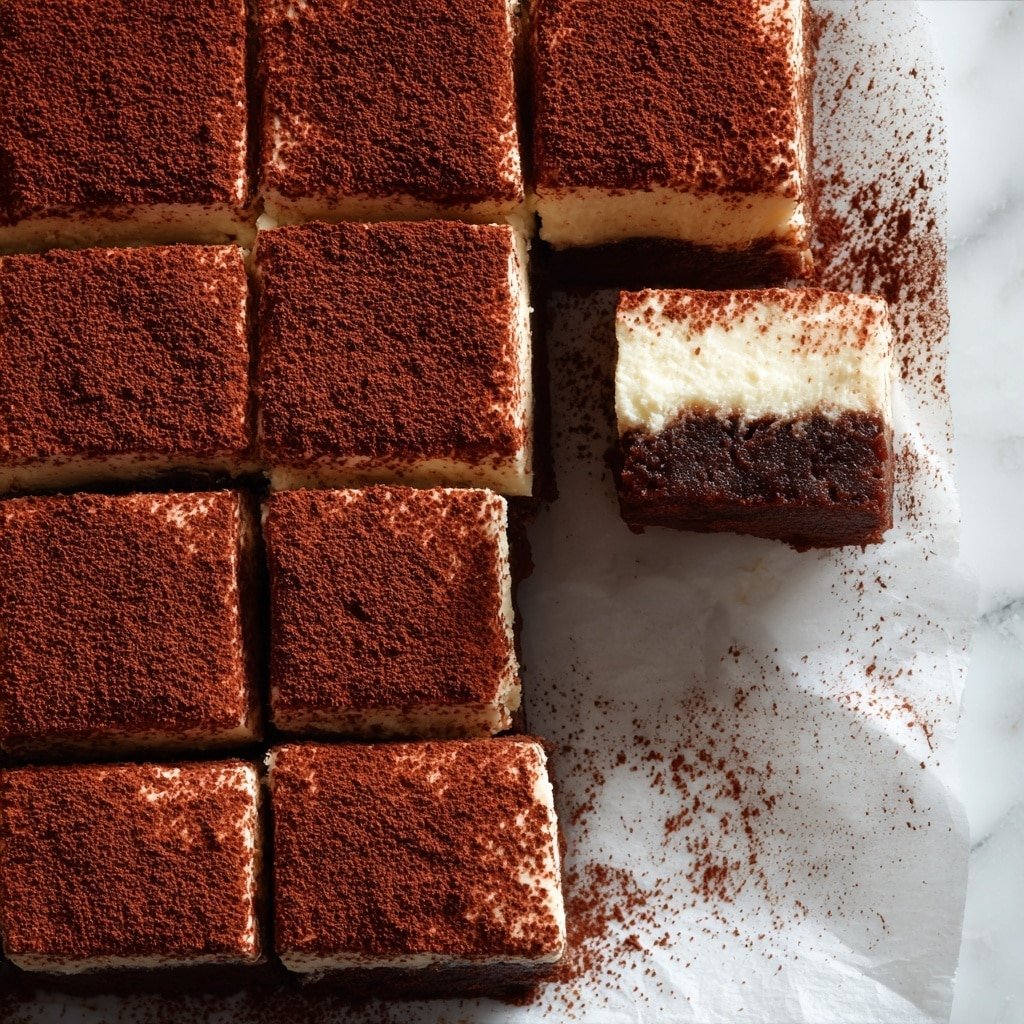
These Gluten Free Tiramisu Brownies blend a fudgy chocolate base with a light, creamy tiramisu topping. Chilled and dusted with cocoa powder, they offer a delicious, elegant twist combining the richness of brownies with the classic Italian tiramisu flavors, perfect for a sophisticated dessert or special occasion.
- Prep Time: 25 minutes
- Cook Time: 25 minutes
- Total Time: 2 hours 15 minutes
- Yield: 9 brownies
- Category: Dessert
- Method: Baking
- Cuisine: Fusion
- Diet: Gluten Free
Ingredients
Brownie Base
- 1/2 cup gluten free all-purpose flour
- 1/3 cup cocoa powder
- 1 tablespoon espresso powder
- 1 cup sugar
- 2 large eggs
- 1/2 cup melted butter
- 1 teaspoon vanilla extract
Tiramisu Topping
- 1 cup mascarpone cheese
- 3/4 cup heavy whipping cream
- 1/3 cup powdered sugar
- 1/4 cup brewed espresso or strong coffee, cooled
- Unsweetened cocoa powder (for dusting)
Instructions
- Preheat Oven: Preheat your oven to 350°F (175°C) and line an 8×8 inch baking pan with parchment paper to ensure easy removal of brownies.
- Mix Wet Ingredients: In a bowl, combine melted butter, sugar, eggs, and vanilla extract. Mix until the mixture is smooth and homogenous, providing the base for a fudgy brownie texture.
- Combine Dry Ingredients: In a separate bowl, whisk together the gluten free flour, cocoa powder, and espresso powder to evenly distribute the flavors and leavening.
- Make Batter: Gradually add the dry ingredients to the wet ingredients, mixing gently until a thick batter forms, being careful not to overmix to maintain brownie fudginess.
- Bake Brownies: Pour the batter into the prepared pan, spreading evenly. Bake for 20–25 minutes until a toothpick inserted comes out with moist crumbs. Remove from the oven and cool completely before proceeding.
- Prepare Mascarpone Mixture: In a bowl, beat mascarpone cheese with powdered sugar and vanilla extract until smooth and creamy for the tiramisu layer.
- Whip Cream: In another bowl, whip heavy cream to stiff peaks. This will add lightness when folded into the mascarpone mixture.
- Combine Cream Layers: Gently fold the whipped cream into the mascarpone mixture to create a fluffy tiramisu topping. Then add cooled brewed espresso and fold carefully to incorporate the coffee flavor without deflating the cream.
- Assemble Tiramisu Brownies: Spread the tiramisu cream evenly over the completely cooled brownies to form a smooth topping layer.
- Chill: Refrigerate the assembled brownies for at least 2 hours to allow the tiramisu layer to set and flavors to meld beautifully.
- Serve: Before serving, dust the top with unsweetened cocoa powder for an elegant finish. Slice into 9 pieces and serve chilled.
Notes
- Chill the brownies fully before adding the tiramisu layer for best results and optimal texture.
- Use room temperature mascarpone to avoid lumps and ensure a smooth cream layer.
- Store leftovers in the refrigerator for up to 4 days to maintain freshness and flavor.