
Whenever I crave comfort food that’s both nostalgic and surprisingly quick, I turn to this Stovetop Macaroni and Cheese Recipe. I remember serving this to a group of friends on a chilly evening, and it disappeared in minutes—go figure! There’s something magical about creamy cheese enveloping perfectly tender macaroni, all made in just one pot. It’s my go-to dinner not only for ease but also because it reminds me of cozy family dinners, where simplicity meets irresistible flavor.
Why This Recipe Shines
- Flavor Harmony: The rich blend of mozzarella for meltiness and sharp cheddar creates a balanced, luscious cheese sauce.
- Easy Assembly: Made all in one pot—no boiling pasta separately—so you save on dishes and fuss.
- Texture Play: Silky sauce clings to tender but firm macaroni, offering that perfect creamy mouthfeel.
- Showstopper Finish: Optional seasonings like garlic and mustard powder add a subtle depth that elevates the classic.
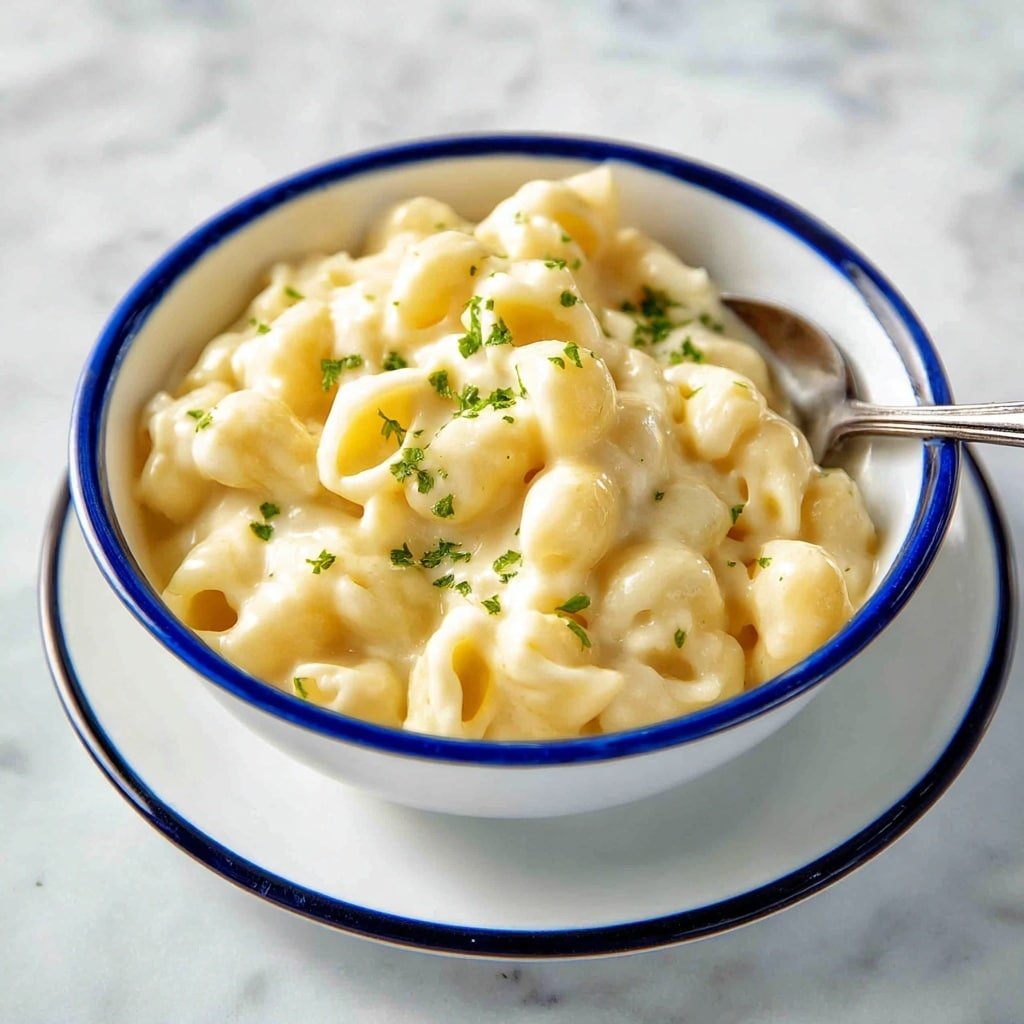
This Stovetop Macaroni and Cheese Recipe is a real crowd-pleaser for its bright yellow-orange color, inviting aroma of melting cheeses, and cozy creamy texture you’ll want seconds of. It’s not just any mac and cheese—it’s glossy, silky, and made in one pot, which means less monitoring and more time spoiling your folks or feeding hungry kids. Plus, the sauce clings so well because the pasta actually cooks in the sauce liquid, blending starch and creaminess like pasta lovers dream of.
Don’t worry if you’re new to stovetop mac and cheese—you’ll find the instructions straightforward, and I’m with you every step of the way. I’ll help you nail the timing so your macaroni is tender, not mushy, and the cheese sauce is smooth without slipping off the noodles. Ready to make one of the best comfort meals in just about 20 minutes?

Ingredients You’ll Be Working With
Measuring your ingredients as you go will make this recipe so much smoother. Don’t worry about exact grams until you get to the recipe card at the end—that’s where you can print or save precise amounts. For now, here’s a good overview of what you’re using and why:
- Butter: Creates the base for the roux that thickens the sauce; unsalted is best so you control salt.
- Flour: Helps build a silky-thick sauce by combining with butter to make a roux.
- Milk (full fat preferred): Makes the sauce creamy and luscious; lower fat milk works but less rich.
- Water: Part of the liquid that cooks the pasta directly in the sauce mixture for perfect texture.
- Elbow macaroni (uncooked): Classic pasta shape that holds sauce beautifully.
- Mozzarella cheese (shredded): Melts smoothly to give that stretchy, gooey feel.
- Cheddar or other flavorful cheese (shredded): Adds sharpness and depth to the sauce flavor.
- Salt and pepper: Essential for seasoning and balancing flavors.
- Seasonings (optional – garlic powder, onion powder, mustard powder): Boost the savory complexity.
If you’re short on any cheese types, feel free to swap with similar melting cheeses like Gruyere or Monterey Jack. Just avoid pre-shredded cheeses with anti-caking agents since they don’t melt as smoothly.
Chef’s Note
You’ll find the complete list of ingredients with exact measurements in the printable recipe card at the bottom of this post.
Tools You’ll Need
- Medium pot or large saucepan: A heavy-bottomed pan helps cook evenly without burning.
- Whisk or wooden spoon: For stirring the roux and sauce so it stays smooth and lump-free.
- Measuring cups and spoons: Essential for accurate liquids and spices, ensuring a well-balanced sauce.
- Cheese grater (if not pre-shredded): Freshly grated cheese melts better for that glossy finish.
- Lid for pot: Keeps heat steady as pasta cooks in the sauce.
How to Make Stovetop Macaroni and Cheese Recipe
Ready to dive in? This recipe comes together in one pot with straightforward steps to guide you. Follow along, and you’ll have creamy mac and cheese that’s perfectly cooked without extra clean-up.
- Melt the butter and start the roux: Over medium heat, melt 50 grams (about 3 1/2 tbsp) butter. Once melted, add 3 tablespoons flour and cook for 1 minute while stirring. This cooks the raw flour taste out and starts thickening your sauce.
- Add milk gradually: Pour in about 3/4 cup of the 2 cups milk and whisk until smooth—it’ll look like a thin paste (a slurry). Then add the remaining milk, stirring so all blends evenly.
- Mix in water and seasonings: Pour in 2 1/2 cups water along with your optional seasonings (1 tsp garlic powder, 1/2 tsp onion powder, 1/2 tsp mustard powder) if using, plus salt and pepper to taste.
- Add elbow macaroni: Stir in 250 grams (about 2 1/2 cups) of uncooked elbow macaroni. Stir occasionally as it heats. Once you see steam rising, reduce heat to medium-low.
- Cook patiently, stirring often: Let the pasta cook gently for 9–10 minutes, stirring regularly. The sauce will bubble gently and thicken while pasta cooks through—aim for tender but slightly firm (al dente). The sauce should still be a bit thin at this point.
- Off heat, stir in cheese: Remove pot from stove and quickly stir in 3/4 cup shredded mozzarella and 1 1/2 cups shredded cheddar or other flavorful cheese. The cheese will melt smoothly as you stir, and the sauce will thicken and become creamy.
- Season and serve: Taste and adjust salt and pepper if needed. Serve immediately for best texture and flavor.
Kitchen Wisdom
- Tip 1: Remove from heat when pasta is still slightly firm; it will soften more in the sauce off the stove.
- Tip 2: Stir cheese in quickly off heat—the sauce thickens best this way without clumping.
- Tip 3: If sauce gets too thick, just add a splash of milk or water to loosen it up.
- Tip 4: Use a mix of mozzarella and a sharp cheese like cheddar for best flavor and melt.
How to Serve

Flavor Boosters
If you want to add even more flavor, try sprinkling crispy bacon bits or toasted breadcrumbs on top for crunch. A light dusting of smoked paprika or a drizzle of truffle oil can turn this classic into something fancy without losing its soul. Fresh herbs like chives or parsley add a pop of bright green and freshness.
Perfect Pairings
This stovetop macaroni and cheese shines alongside crisp green salads or roasted vegetables such as broccoli or Brussels sprouts. For drinks, a chilled white wine or sparkling water with lemon complements the creamy, cheesy richness beautifully. It also pairs well with simple grilled chicken or barbecue for a comforting, full meal.
Presentation Touches
Serve this mac and cheese straight from the pot for casual family nights, or spoon it into individual ramekins and sprinkle with panko breadcrumbs and parmesan before broiling for a bubbling golden crust at dinner parties. Portion it out into airtight containers for easy lunch servings the next day too — it reheats beautifully.
Variations & Easy Swaps
- Use non-dairy milk like oat or almond milk and vegan cheese for a dairy-free version.
- Mix in sautéed mushrooms or caramelized onions for an umami twist.
- Try spicy cheddar or pepper jack cheese for extra kick.
- For gluten-free, swap flour with cornstarch and use gluten-free pasta.
- Add a spoonful of mustard or hot sauce into the sauce for a tangy flavor punch.
Make-Ahead, Storage & Reheating
- Store leftovers in an airtight container for up to 3 days in the fridge.
- Reheat gently on the stovetop with a splash of milk, stirring until creamy again.
- You can freeze mac and cheese for up to 2 months; thaw overnight in the fridge before reheating.
- To reheat in the oven, place in an oven-safe dish, cover with foil, and warm at 350°F (175°C) until heated through.
FAQs
- Can I use different pasta shapes for this stovetop macaroni and cheese recipe?
Absolutely! Small pasta shapes like penne or shells work well, just adjust cooking time as needed. - Why is the sauce sometimes grainy?
Graininess usually happens if cheese is overheated or added too early. Stir cheese in off-heat quickly for smooth melting. - Can I make this recipe without the optional seasonings?
Yes! The garlic, onion, and mustard powders add extra flavor but aren’t necessary if you prefer plain cheesy taste. - What’s the best cheese mix for flavor and melt?
Mozzarella for texture plus sharp cheddar for flavor is a classic combo I recommend. - Can I double this recipe for a larger crowd?
Yes, just use a larger pot and increase cooking time slightly. Stir well to avoid sticking.
Stovetop Macaroni and Cheese Recipe

This classic stovetop macaroni and cheese is made in one pot for a creamy, silky sauce that clings perfectly to tender elbow macaroni. Using a combination of mozzarella for meltiness and cheddar or other flavorful cheeses, this recipe delivers comfort food with a rich, cheesy flavor and a glossy finish. The unique technique involves cooking the pasta directly in the sauce, ensuring it is flavorful and never overcooked.
- Prep Time: 3 minutes
- Cook Time: 15 minutes
- Total Time: 18 minutes
- Yield: 5 to 6 servings
- Category: Dinner, Side
- Method: Stovetop
- Cuisine: Western
Ingredients
Main Ingredients
- 50 g / 3 1/2 tbsp butter
- 3 tbsp all-purpose flour
- 2 cups milk (full fat preferred, low fat okay)
- 2 1/2 cups water
- 250 g / 2 1/2 cups elbow macaroni, uncooked
- 3/4 cup mozzarella cheese, shredded
- 1 1/2 cups cheese (Cheddar, Colby, Gruyere), shredded
- Salt and pepper to taste
Optional Seasonings
- 1 tsp garlic powder
- 1/2 tsp onion powder
- 1/2 tsp mustard powder
Instructions
- Make the roux: Melt butter in a medium pot or large saucepan over medium heat. Add flour and cook for 1 minute to form a roux that will thicken the sauce.
- Add milk slurry: Pour about 3/4 cup of milk into the roux and stir briskly to create a smooth slurry, preventing lumps.
- Add remaining liquids and seasonings: Stir in the remaining milk, then add 2 1/2 cups water along with garlic powder, onion powder, and mustard powder if using. Mix everything thoroughly.
- Add macaroni: Add uncooked elbow macaroni to the pot and stir to combine. Heat over medium, stirring occasionally until wisps of steam appear, then reduce heat to medium-low.
- Cook pasta in sauce: Simmer gently for 9–10 minutes, stirring regularly, until the macaroni is tender but still firm and the sauce thickens but remains pourable.
- Finish with cheese: Remove the pot from heat and quickly stir in shredded mozzarella and cheddar (or chosen cheeses) until melted and the sauce thickens to a creamy consistency. Adjust salt and pepper to taste.
- Serve immediately: Enjoy the macaroni and cheese while hot and creamy.
Notes
- This recipe uses a mix of mozzarella and cheddar or similar cheeses for the best melt and flavor. Avoid using only mozzarella as it lacks flavor, and be cautious with Tasty Cheese in Australia as it can cause a floury sauce.
- The pasta continues cooking after removing from heat, so take the pot off when macaroni is slightly firm to avoid overcooking.
- If sauce is too thick after cheese is added, thin with a splash of milk or water. If too thin, cook a bit longer.
- The starch from cooking pasta in the sauce creates a glossy, silky texture that clings beautifully to the noodles.
- For a baked version, add a buttered breadcrumb topping and briefly grill before serving.